Install with the KOTS CLI
This topic describes how to install an application with Replicated KOTS in an existing cluster using the KOTS CLI.
Overview
You can use the KOTS CLI to install an application with Replicated KOTS. A common use case for installing from the command line is to automate installation, such as performing headless installations as part of CI/CD pipelines.
To install with the KOTS CLI, you provide all the necessary installation assets, such as the license file and the application config values, with the installation command rather than through the Admin Console UI. Any preflight checks defined for the application run automatically from the CLI rather than being displayed in the Admin Console.
The following shows an example of the output from the kots install command:
• Deploying Admin Console
  • Creating namespace ✓
  • Waiting for datastore to be ready ✓
• Waiting for Admin Console to be ready ✓
• Waiting for installation to complete ✓
• Waiting for preflight checks to complete ✓

• Press Ctrl+C to exit
• Go to http://localhost:8800 to access the Admin Console

• Go to http://localhost:8888 to access the application
Prerequisite
Create a ConfigValues YAML file to define the configuration values for the application release. The ConfigValues file allows you to pass the configuration values for an application from the command line with the install command, rather than through the Admin Console UI. For air-gapped environments, ensure that the ConfigValues file can be accessed from the installation environment.
The KOTS ConfigValues file includes the fields that are defined in the KOTS Config custom resource for an application release, along with the user-supplied and default values for each field, as shown in the example below:
apiVersion: kots.io/v1beta1
kind: ConfigValues
spec:
  values:
    text_config_field_name:
      default: Example default value
      value: Example user-provided value
    boolean_config_field_name:
      value: "1"
    password_config_field_name:
      valuePlaintext: examplePassword
During installation, KOTS automatically generates a ConfigValues file and saves the file in a directory called upstream. After installation, you can view the generated ConfigValues file in the Admin Console View files tab or from the command line by running the kubectl kots get config command.
To get the ConfigValues file from an installed application instance:
-
Install the target release in a development environment. You can either install the release with Replicated Embedded Cluster or install in an existing cluster with KOTS. For more information, see Online Installation with Embedded Cluster or Online Installation in Existing Clusters with KOTS.
-
Depending on the installer that you used, do one of the following to get the ConfigValues for the installed instance:
-
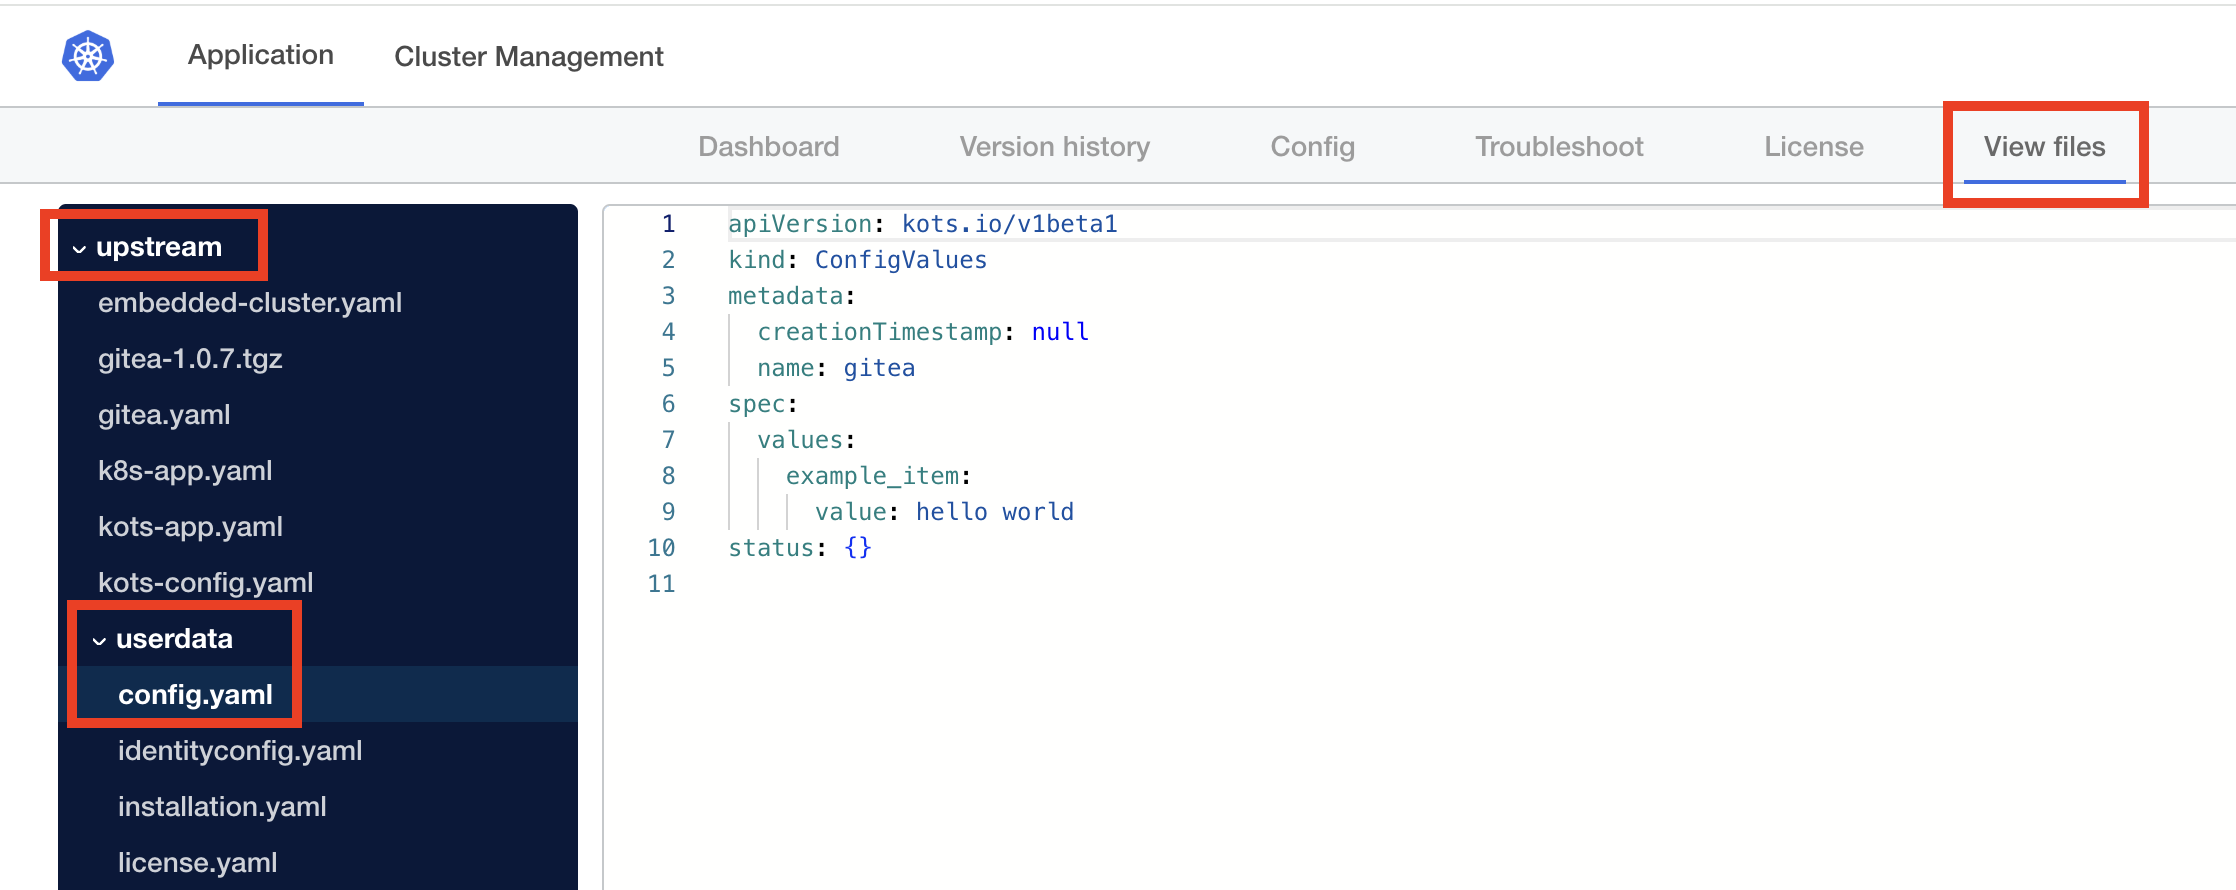
For Embedded Cluster installations: In the Admin Console, go to the View files tab. In the filetree, go to upstream > userdata and open config.yaml, as shown in the image below:
-
For KOTS installations in an existing cluster: Run the
kubectl kots get configcommand to view the generated ConfigValues file:kubectl kots get config --namespace APP_NAMESPACE --decryptWhere:
APP_NAMESPACEis the cluster namespace where KOTS is running.- The
--decryptflag decrypts all configuration fields withtype: password. In the downloaded ConfigValues file, the decrypted value is stored in avaluePlaintextfield.
The output of the
kots get configcommand shows the contents of the ConfigValues file. For more information about thekots get configcommand, including additional flags, see kots get config.
-
Online (Internet-Connected) Installation
To install with KOTS in an online existing cluster:
-
Install the KOTS CLI:
curl https://kots.io/install | bashFor more installation options, see Installing the KOTS CLI.
-
Install the application:
kubectl kots install APP_NAME \
  --shared-password PASSWORD \
  --license-file PATH_TO_LICENSE \
  --config-values PATH_TO_CONFIGVALUES \
  --namespace NAMESPACE \
  --no-port-forward
Replace:
-
APP_NAMEwith a name for the application. This is the unique name that KOTS will use to refer to the application that you install. -
PASSWORDwith a shared password for accessing the Admin Console. -
PATH_TO_LICENSEwith the path to your license file. See Downloading Customer Licenses. For information about how to download licenses with the Vendor API v3, see Download a customer license file as YAML in the Vendor API v3 documentation. -
PATH_TO_CONFIGVALUESwith the path to the ConfigValues file.
NAMESPACEwith the namespace where you want to install both the application and KOTS.
-
Air Gap Installation
To install with KOTS in an air-gapped existing cluster:
-
Install the KOTS CLI. See Manually Download and Install in Installing the KOTS CLI.
-
Download the
kotsadm.tar.gzair gap bundle from the Releases page in the kots repository in GitHub. Ensure that you can access the downloaded bundle from the environment where you will install the application.noteThe version of the
kotsadm.tar.gzair gap bundle used must be compatible with the version of the.airgapbundle for the given application release.noteThe versions of the KOTS CLI and the
kotsadm.tar.gzbundle must match. You can check the version of the KOTS CLI withkubectl kots version. -
Extract the KOTS Admin Console container images from the
kotsadm.tar.gzbundle and push the images to your private registry:kubectl kots admin-console push-images ./kotsadm.tar.gz REGISTRY_HOST \
--registry-username RW_USERNAME \
--registry-password RW_PASSWORDReplace:
-
REGISTRY_HOSTwith the hostname for the private registry. For example,private.registry.hostormy-registry.example.com/my-namespace. -
RW_USERNAMEandRW_PASSWORDwith the username and password for an account that has read and write access to the private registry.noteKOTS does not store or reuse these read-write credentials.
-
-
Install the application:
kubectl kots install APP_NAME \
  --shared-password PASSWORD \
  --license-file PATH_TO_LICENSE \
  --config-values PATH_TO_CONFIGVALUES \
  --airgap-bundle PATH_TO_AIRGAP_BUNDLE \
  --namespace NAMESPACE \
  --kotsadm-registry REGISTRY_HOST \
  --registry-username RO_USERNAME \
  --registry-password RO_PASSWORD \
  --no-port-forward
Replace:
-
APP_NAMEwith a name for the application. This is the unique name that KOTS will use to refer to the application that you install. -
PASSWORDwith a shared password for accessing the Admin Console. -
PATH_TO_LICENSEwith the path to your license file. See Downloading Customer Licenses. For information about how to download licenses with the Vendor API v3, see Download a customer license file as YAML in the Vendor API v3 documentation. -
PATH_TO_CONFIGVALUESwith the path to the ConfigValues file.
-
PATH_TO_AIRGAP_BUNDLEwith the path to the.airgapbundle for the application release. You can build and download the air gap bundle for a release in the Vendor Portal on the Release history page for the channel where the release is promoted.Alternatively, for information about building and downloading air gap bundles with the Vendor API v3, see Trigger airgap build for a channel's release and Get airgap bundle download URL for the active release on the channel in the Vendor API v3 documentation.
NAMESPACEwith the namespace where you want to install both the application and KOTS.
-
REGISTRY_HOSTwith the same hostname for the private registry where you pushed the Admin Console images. -
RO_USERNAMEandRO_PASSWORDwith the username and password for an account that has read-only access to the private registry.noteKOTS stores these read-only credentials in a Kubernetes secret in the same namespace where the Admin Console is installed.
KOTS uses these credentials to pull the images. To allow KOTS to pull images, the credentials are automatically created as an imagePullSecret on all of the Admin Console Pods.
-
(Optional) Access the Admin Console
By default, during installation, KOTS automatically opens localhost port 8800 to provide access to the Admin Console. Using the --no-port-forward flag with the kots install command prevents KOTS from creating a port forward to the Admin Console.
After you install with the --no-port-forward flag, you can optionally create a port forward so that you can log in to the Admin Console in a browser window.
To access the Admin Console:
-
If you installed in a VM where you cannot open a browser window, forward a port on your local machine to
localhost:8800on the remote VM using the SSH client:ssh -L LOCAL_PORT:localhost:8800 USERNAME@IP_ADDRESSReplace:
LOCAL_PORTwith the port on your local machine to forward. For example,9900or8800.USERNAMEwith your username for the VM.IP_ADDRESSwith the IP address for the VM.
Example:
The following example shows using the SSH client to forward port 8800 on your local machine to
localhost:8800on the remote VM.ssh -L 8800:localhost:8800 user@ip-addr -
Run the following KOTS CLI command to open localhost port 8800, which forwards to the Admin Console service:
kubectl kots admin-console --namespace NAMESPACEReplace
NAMESPACEwith the namespace where the Admin Console was installed.For more information about the
kots admin-consolecommand, see admin-console in the KOTS CLI documentation. -
Open a browser window and go to
https://localhost:8800. -
Log in to the Admin Console using the password that you created as part of the
kots installcommand.